Nowadays, a lot of businesses are suffering from such widespread malicious attempts as DDoS attacks. A distributed denial-of-service (DDoS) attack is a cyber-attack that is intended to overload the server where the website is hosted with fake requests. As a consequence, the target becomes unable to resolve legitimate requests. This might cause a bad experience for visitors leading to reduced search engine rankings, and subsequent financial, and reputation loss.
Cloudflare's I'm Under Attack Mode performs additional security checks to help mitigate layer 7 DDoS attacks. Validated users access your website and suspicious traffic is blocked. It is designed to be used as one of the last resorts when a zone is under attacked (and will temporarily pause access to your site and impact your site analytics).
The followings are the steps to enable Cloudflare under attack.
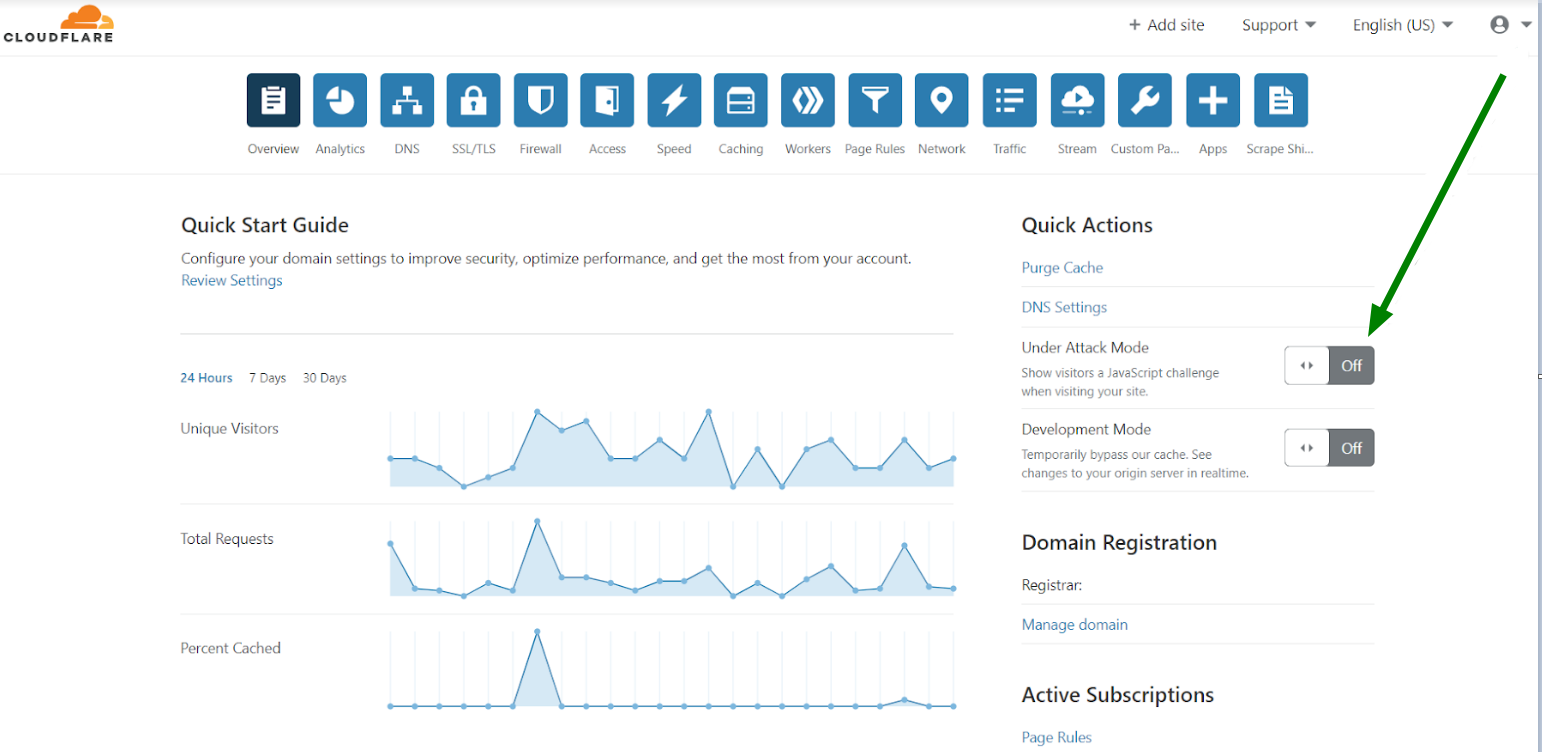
1. Login to your Cloudflare account.
2. Navigate to the Quick Actions tab.
3. Turn the Under Attack Mode toggle on.
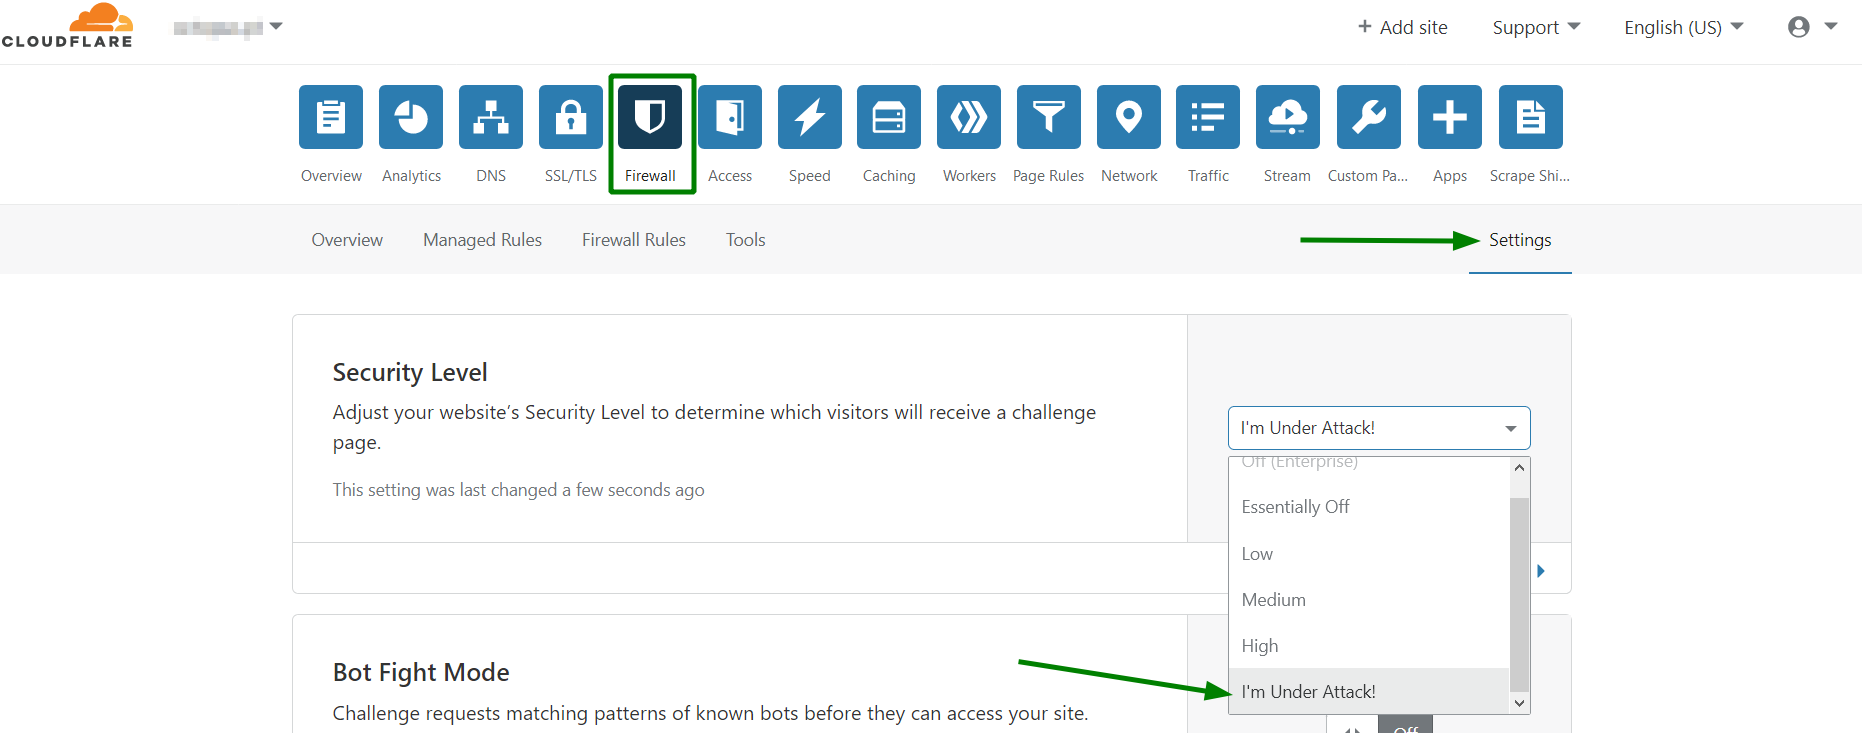
Another option to do the same is using the Firewall tab >> Settings >> I'm Under Attack!:
4. You will see the message that the Under Attack Mode is active.
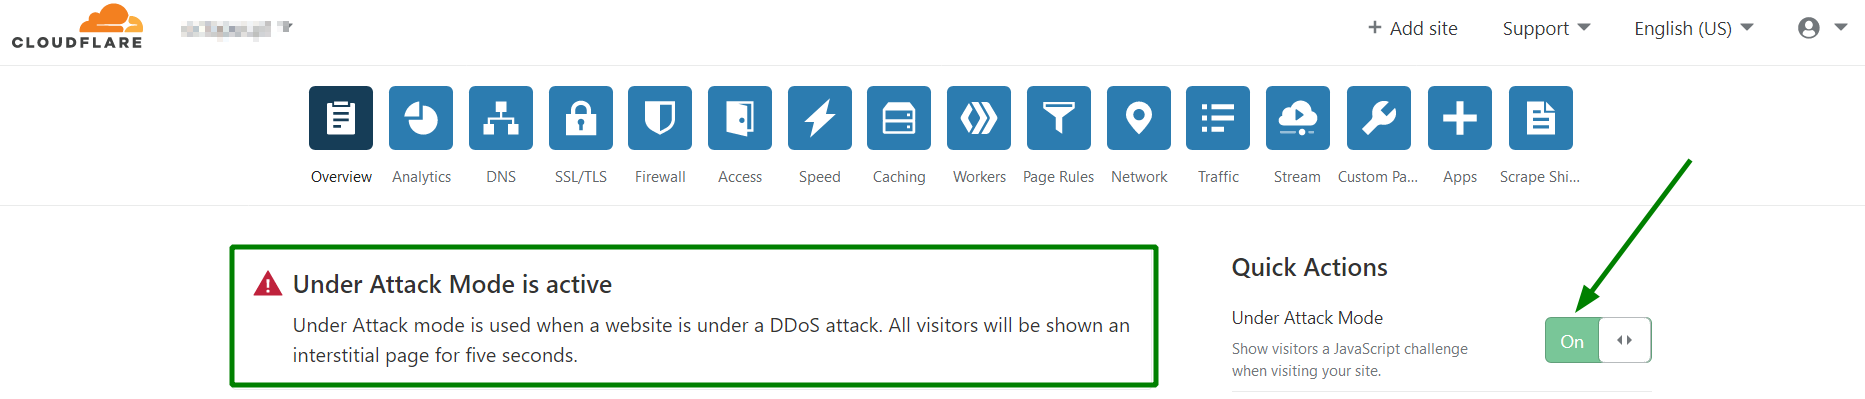
Now validated users will be able to access your website, and suspicious traffic will be blocked. When enabled, your visitors will see the following page and will be redirected to the website in 5 seconds:
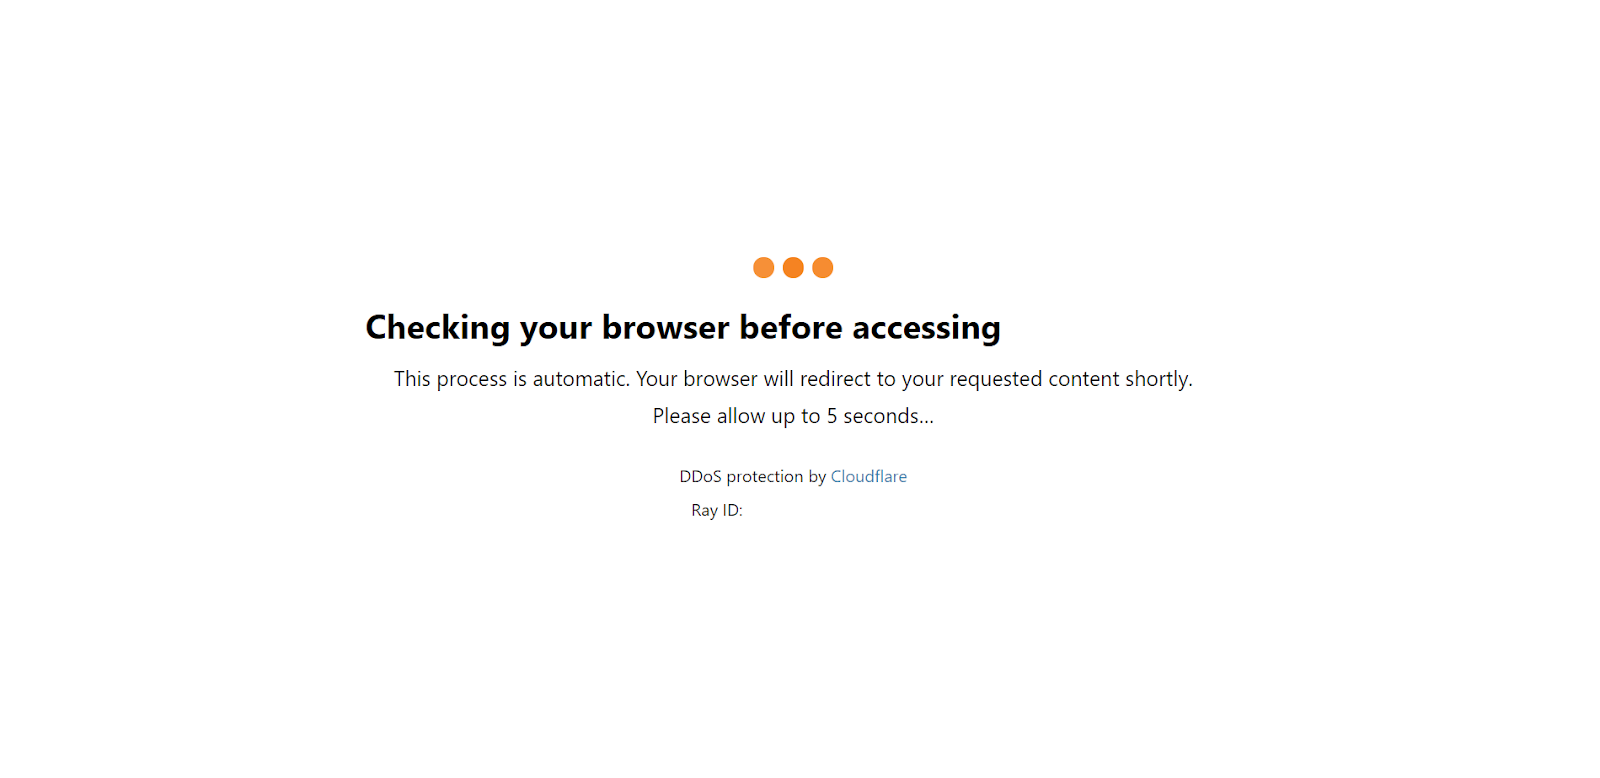
NOTE 1: Browser JavaScript and Cookie support are required to pass this page.
NOTE 2: the I'm Under Attack mode is disabled as soon as the attack ceases. As a permanent solution against persistent attacks, we recommend that an advanced DDoS protection service with guaranteed uptime is used.
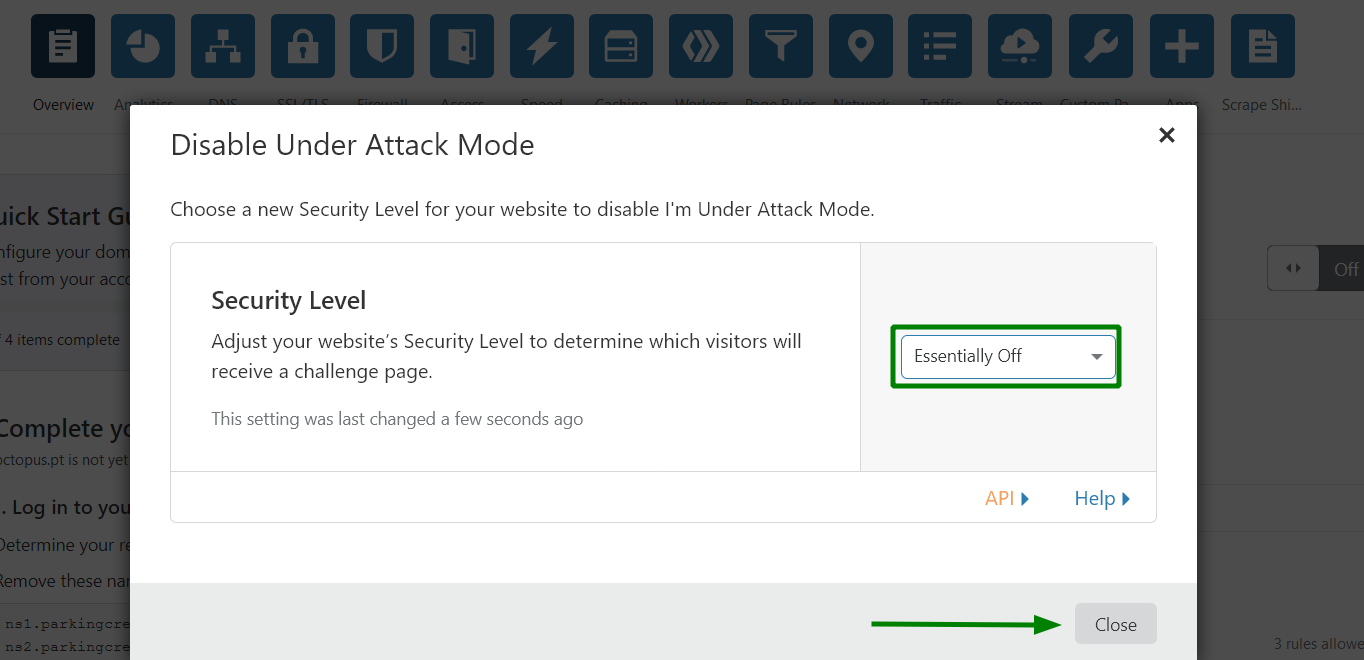
In case you would like to turn this mode off, just click on the Under Attack Mode toggle one more time, choose Essentially Off from the drop-down menu, and click on the Close button.
That’s it!
Article ID: 2267, Created: August 9, 2023 at 9:42 PM, Modified: December 9, 2023 at 7:05 AM